- 发布于
Avolve Part-3
- 作者

- Name
- CuB3y0nd
- GitHub
- @CuB3y0nd
Table of Contents
这是 Avolve 系列的第三部分,我们使用 神经网络 和 遗传算法 编写模拟进化代码:
在上一篇文章中,我们实现了一个简单的前馈神经网络,它可以将数字传播到其随机化的层中。这是我们努力创建一个运作良好的大脑的第一个里程碑。
然而,随机性只能帮助我们到这里。在大多数情况下,进化是关于做出小的、渐进的变化,使系统随着时间变得更好。这样,我们创建的大脑开始积累知识并按我们期望的方式运作(只要吃到食物,小鸟们!)。
但是我们如何训练一堆浮点数呢?
计划
稍后,我们将通过在 rust 中实现一个遗传算法来学习它是如何工作的。我们将深入探讨选择 (Selection)、交叉 (Crossover) 和突变 (Mutation) 如何结合在一起,并允许计算机看似凭空找到复杂的解决方案。
我们将尽量保持通用性,也就是说,我们不会将特定的选择或交叉算法硬编码到代码中,而是使用 trait 来创建一个库,甚至可以发布到 crates.io 上!
就像之前一样,今天我们将探讨 rust 语法的各种复杂之处,重点放在术语上。
希望在这篇文章结束时你可以说:我可以自己实现这一切!
简介
首先,让我们回顾一下遗传算法的工作原理以及这个项目的目的。
我们的问题是,我们有一个对象,一个神经网络——它由大量参数定义。它们的数量如此之多,即使是对于最小的网络,我们也不可能在有生之年穷尽它们的所有组合。
Note
所有可能的参数通常被称为搜索空间 (Search Space);一个博学的人可能会说:我们的问题的搜索空间非常巨大,然后他就逃跑了。
我们可以模仿自然的方式:如果我们从一堆随机的 次优 (Suboptimal) 解开始,我们可以尝试改进它们,随着时间的推移,逐渐获得更好的答案。
模拟所有这些进化机制的方法之一是遗传算法——它从一堆随机的解决方案(一个种群)开始,然后利用交叉和突变来改进它们,利用适应度函数评估到目前为止找到的解决方案(个体):
Note
由于遗传算法涉及到处理随机数,它是一种随机化算法的例子。
随机化算法通过牺牲准确性来换取性能。它并不总是返回最佳答案,但通常会得到 Pretty Close Pretty Cheaply ® 的结果。
蔬菜供应商才不希望你知道这一点,其实有一个基于遗传算法的简单程序就可以帮助你成为一个胡萝卜大亨:
10  go to your garden
20  sow a few random carrots
30  wait for those carrots to sprout
40  choose the best carrot-children and sow them
50  goto 30

in this world:
- population = carrots
- individual = carrot
- mutation & crossover = happen automatically (free labor!)
- fitness function = your eyes & brain
到现在为止,这些术语对你来说应该已经很熟悉了。我们在第一篇文章中已经介绍了遗传算法的基础知识;到本文结束时,你将已经回答了以下问题:
- 但是你如何选择个体呢?肯定有一千种方法可以做到!(是的,确实有)
- 但是你如何表示它们的基因组呢?肯定有一千种方法可以做到!(是的,确实有)
- 但是你如何在 rust 中实现它呢?你承诺它将在浏览器中工作!(是的,它会的)
实现框架
我们首先需要在工作区中创建第二个 crate:
cargo new genetic-algorithm --name genetic-algorithm --lib
那是由 Cargo 为我们创建的不错的 lib.rs 文件。让我们用一个入口点来替换它:
pub struct GeneticAlgorithm;
我们的遗传算法将只提供一个功能——有时称为迭代 (Iterate),有时称为步骤 (Step)或过程 (Process)。我扔了一枚硬币并决定:
impl GeneticAlgorithm {
    pub fn evolve(&self) {
        todo!()
    }
}
我们正在进化什么?当然是鸟的种群!
impl GeneticAlgorithm {
    pub fn evolve(&self, population: &[???]) -> Vec<???> {
        todo!()
    }
}
我们实际的问题将依赖于神经网络,但由于我们希望这个库是通用的,我们不能强制它接受硬编码的 NeuralNetwork。相反,我们可以引入一个类型参数:
impl GeneticAlgorithm {
    pub fn evolve<I>(&self, population: &[I]) -> Vec<I> {
        todo!()
    }
}
Note
I 代表个体,至于 Rust 的术语:
// visibility  generics   _ function parameters
// |          _|     ____|  (or just "parameters")
// |         |      |
// v-v       v-----vv----------v
   pub fn foo<'a, T>(bar: &'a T) { /* ... */ }
//            ^^  ^  ^--------^
//            |   |  |
//            |   |  function parameter
//            |   |  (or just "parameter")
//            |   type parameter
//            lifetime parameter
如果你想向别人描述这个签名,你会说:
public 函数 foo 是泛型的,泛型参数包括生命周期 'a 和类型 T,它接受一个名为 bar 的参数,该参数是对 T 类型的引用。
这是函数的定义,另一方面,你 调用 (Invoke) 函数的地方被称为 调用点 (Call Site),你在那里指定的值称为 参数 (Arguments):
// v-----------------------v call site
   foo::<'static, f32>(&1.0);
//       ^-----^  ^-^  ^--^
//       |        |    |
//       |        |    function argument
//       |        |    (or just "argument")
//       |        type argument
//       lifetime argument
大多数这种术语(例如 argument 和 parameter 之间的区别)在所有编程语言中都是通用的,因此值得记住。
吸取过去的教训,让我们不要忘记前置条件:
impl GeneticAlgorithm {
    pub fn evolve<I>(&self, population: &[I]) -> Vec<I> {
        assert!(!population.is_empty());

        /* ... */
    }
}
至于算法本身的框架,大致如下:
impl GeneticAlgorithm {
    pub fn evolve<I>(&self, population: &[I]) -> Vec<I> {
        /* ... */

        (0..population.len())
            .map(|_| {
                // TODO selection
                // TODO crossover
                // TODO mutation
                todo!()
            })
            .collect()
    }
}
实现 Selection
此时,在循环内部,我们必须选择两个个体。它们将分别成为父母,为我们「生」出一个数字后代。
选择个体被称为遗传算法的选择阶段 (Selection Stage),它应满足以下两个性质:
- 每个个体被选中的概率都应该是非零的
- 一个适应度得分更高的个体平均来说应该比适应度得分更低的个体更频繁地被选中
因为我们必须计算适应度分数,让我们首先考虑一下如何编写计算适应度的函数。我们有两种独特的方法:
- 将适应度函数作为个体的参数:
impl GeneticAlgorithm {
    pub fn evolve<I>(
        &self,
        population: &[I],
        evaluate_fitness: &dyn Fn(&I) -> f32,
    ) -> Vec<I> {
        /* ... */
    }
}
- 将适应度分数作为个体的属性:
pub trait Individual {
    fn fitness(&self) -> f32;
}

impl GeneticAlgorithm {
    pub fn evolve<I>(&self, population: &[I]) -> Vec<I>
    where
        I: Individual,
    {
        /* ... */
    }
}
第一种方法:
- 允许为一种个体提供许多不同的适应度函数,这对某些人可能会很有用(不过对我们来说并没有什么用)
- 需要在每次调用
.evolve()时指定适应度函数,这感觉有点笨拙
第二种方法:
- 允许将所有与个体相关的属性封装到一个单一的
trait中,让用户更容易发现他们需要提供的内容 - 指定不同的适应度函数是可能的,但有点棘手
我的直觉告诉我引入一个 trait(正如你稍后会看到的,无论如何我们都需要这样一个 trait),所以就是方法二了。
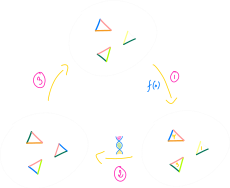
至于选择方法,我们将使用一种被称为适应度比例选择 (Fitness Proportionate Selection)(也叫做轮盘赌选择 (Roulette Wheel Selection))的算法,因为它很容易理解。为了理解它的工作原理,让我们想象一下我们有以下三个个体:
| Individual | Fitness score | Fitness score % |
|---|---|---|
| A | 3 | |
| B | 2 | |
| C | 1 |
如果我们把它们都放在一个轮盘上,饼图都可以。每个个体都得到一个轮盘的一部分,这个部分的大小与它们的适应度分数在整个种群中的比例相等:

……因此,随机选择一个个体就等同于「旋转」轮盘,以随机的力量旋转,然后看看得到了什么:
Important
实际上,轮盘赌选择在实践中被人们认为不太好。这是因为它允许最优秀的个体主导模拟。
假设你的遗传算法找到了一个比其它解决方案都要好的多的解决方案:

……在这种情况下,轮盘赌选择将在 99% 的情况下愉快地选择这个绿色解决方案,使其余的个体成为一支复制粘贴的绿色克隆大军。
你可能会想:但找到最好的解决方案难道不是重点吗?
……确实如此。但重要的是要记住,由遗传算法找到的解决方案始终是迄今为止最好的。如果你过早地放弃了一个看似不太有希望的解决方案,那你永远不会知道是否通过调整一些参数会使它在长期内成为一个更好的解决方案。
换一种说法:拥有更多多样化的人类,就有更大的机会其中一个恰好是天才。
为简单起见,我们将继续使用轮盘赌选择。但如果你感觉冒险,我只想说 Rank Selection 是一种不会表现出这种主导行为的算法示例,并且它也同样适用于我们的小鸟!
为了践行通用性的承诺,我们不会将库硬编码为使用轮盘赌选择,而是创建一个 trait,这样用户就可以提供他们喜欢的任何算法:
pub trait SelectionMethod {
    fn select(&self);
}
一个选择方法必须能够访问整个种群:
pub trait SelectionMethod {
    fn select<I>(&self, population: &[I]) -> &I
    where
        I: Individual;
}
并且,我们马上就要用到随机数了:
# ...

[dependencies]
rand = "0.8.5"

[dev-dependencies]
rand_chacha = "0.3.1"
Note
工作空间中的每个 crate 都有自己的依赖关系集。我们之前添加到 neural-network/Cargo.toml 中的 rand 不会自动与工作空间中的其它 crate 共享。
从我们之前使用 thread_rng() 的麻烦中吸取教训,让我们通过参数传递 PRNG:
use rand::RngCore;

/* ... */

pub trait SelectionMethod {
    fn select<'a, I>(&self, rng: &mut dyn RngCore, population: &'a [I]) -> &'a I
    where
        I: Individual;
}
瞧瞧,多么美丽的一个签名呀 :D
Note
你可能想知道为什么我们不进一步将 select() 也泛化为 PRNG:
pub trait SelectionMethod {
    fn select<'a, R, I>(
       &self,
       rng: &mut R,
       population: &'a [I],
    ) -> &'a I
    where
        R: RngCore,
        I: Individual;
}
首先,让我们了解一下术语:
dyn Trait、&dyn Trait和&mut dyn Trait都意味着动态分发 (Dynamic Dispatch)T、&T和&mut T都意味着静态分发 (Static Dispatch)
分发是编译器回答泛型类型的「我们应该跳到哪里?」这个问题的方式。
fn foo() {
   bar();

   // ^ compiling this call is easy, because it always jumps into `bar`
}

fn bar() {
   println!("yas queen");
}

fn method(obj: &dyn SomeTrait) {
    obj.method();

    // ^ compiling this call is harder, because there's no single function
    //   this refers to - each implementation of `SomeTrait` provides its
    //   own `fn method(&self) { ... }`
}
举个例子,让我们考虑这个 trait 及其两个实现:
trait Animal {
    fn kind(&self) -> &'static str;
}

// --

struct Chinchilla;

impl Animal for Chinchilla {
    fn kind(&self) -> &'static str {
        "chinchilla"
    }
}

// --

struct Viscacha;

impl Animal for Viscacha {
    fn kind(&self) -> &'static str {
        "viscacha"
    }
}
如果你想创建一个函数来输出任何动物的种类,你可以这样做:
// Using static dispatch (aka static polymorphism):
fn print_kind_static<A>(animal: &A)
where
    A: Animal,
{
    println!("{}", animal.kind());
}

// Using dynamic dispatch (aka dynamic polymorphism, aka runtime polymorphism):
fn print_kind_dynamic(animal: &dyn Animal) {
    println!("{}", animal.kind());
}

fn main() {
    print_kind_static(&Chinchilla);
    print_kind_static(&Viscacha);

    print_kind_dynamic(&Chinchilla);
    print_kind_dynamic(&Viscacha);
}
这两个函数看起来都很相似。那么区别在哪呢?
print_kind_static() 使用了一种被称为 单态化 (Monomorphization) 的技术。这意味着对于每个传递给该函数的动物,编译器都会透明地生成一个对于该函数专用的、「复制粘贴」的版本:
fn print_kind_static__chinchilla(animal: &Chinchilla) {
    println!("{}", Chinchilla::kind(animal));
}

fn print_kind_static__viscacha(animal: &Viscacha) {
    println!("{}", Viscacha::kind(animal));
}

fn main() {
    print_kind_static__chinchilla(&Chinchilla);
    print_kind_static__viscacha(&Viscacha);
}
此时,你可以明白为什么它被称为静态分发。在底层,编译器用静态类型替换动态 traits。
单态化的缺点是编译速度稍慢(编译器不是只处理一个函数,而是必须处理其中的许多函数),但通常它会在运行时产生更快、更优的代码。对于每秒调用这种泛型函数数百万次的应用程序来说,这可能会产生明显的差异。
另一方面,print_kind_dynamic() 使用了一种称为 虚函数表 (vtable) 的技术,其中每个实现都会创建一个专用表,映射到具体的函数:
// (this is pseudo-Rust, just to show the concept)

struct AnimalVtable {
    // Reference to a specific `kind()` function
    kind: fn(*const ()) -> &'static str,
}

const CHINCHILLA_VTABLE: AnimalVtable = AnimalVtable {
    kind: Chinchilla::kind,
};

const VISCACHA_VTABLE: AnimalVtable = AnimalVtable {
    kind: Viscacha::kind,
};

fn print_kind_dynamic(
    animal_obj: *const (),
    animal_vtable: &AnimalVtable,
) {
    println!("{}", animal_vtable.kind(animal_obj));
}

fn main() {
    print_kind_dynamic(&Chinchilla, &CHINCHILLA_VTABLE);
    print_kind_dynamic(&Viscacha, &VISCACHA_VTABLE);
}
由于所有实现都可以通过 AnimalVtable 描述,因此,print_kind_dynamic() 不必被单态化。根据底层类型,编译器将简单地传递不同的 vtable。
在这种情况下,缺点是每次调用 print_kind_dynamic() 时,它都必须经过这个额外的「代理表」,理论上它要比 print_kind_static() 慢。但通常情况下,这种差异并不重要。
回到最初的问题:为什么不使用 where R: RngCore?
因为我们不会每秒调用此方法一百万次,所以这里的额外麻烦是不值得的。
至于实现:
pub struct RouletteWheelSelection;

impl SelectionMethod for RouletteWheelSelection {
    fn select<'a, I>(&self, rng: &mut dyn RngCore, population: &'a [I]) -> &'a I
    where
        I: Individual,
    {
        todo!()
    }
}
……我们可以手动实现它:
impl SelectionMethod for RouletteWheelSelection {
    fn select<'a, I>(&self, rng: &mut dyn RngCore, population: &'a [I]) -> &'a I
    where
        I: Individual,
    {
        let total_fitness: f32 = population
            .iter()
            .map(|individual| individual.fitness())
            .sum();

        // This is a naïve approach for demonstration purposes - a more
        // efficient implementation would invoke `rng` just once
        loop {
            let indiv = population
                .choose(rng)
                .expect("got an empty population");

            let indiv_share = indiv.fitness() / total_fitness;

            if rng.gen_bool(indiv_share as f64) {
                return indiv;
            }
        }
    }
}
……但卓越的代码是
如果你浏览 rand 的文档,你可能会发现一个叫做 SliceRandom 的 trait。如果你看过它的内部实现,你可能会发现一个叫做 choose_weighted() 的方法,它恰好在做我们需要的事情:
use rand::seq::SliceRandom;
use rand::{Rng, RngCore};

/* ... */

impl SelectionMethod for RouletteWheelSelection {
    fn select<'a, I>(&self, rng: &mut dyn RngCore, population: &'a [I]) -> &'a I
    where
        I: Individual,
    {
        population
            .choose_weighted(rng, |individual| individual.fitness())
            .expect("got an empty population")
    }
}
除了信任 rand 开发人员之外,我们如何确定 choice_weighted() 能够满足我们的需要呢?通过测试!
#[cfg(test)]
mod tests {
    use super::*;

    #[test]
    fn roulette_wheel_selection() {
        todo!();
    }
}
通向 TDD-nirvana 的道路上铺满了玫瑰,而我们即将被其中一个荆棘刺到:
#[cfg(test)]
mod tests {
    use super::*;
    use rand::SeedableRng;
    use rand_chacha::ChaCha8Rng;

    #[test]
    fn roulette_wheel_selection() {
        let mut rng = ChaCha8Rng::from_seed(Default::default());

        let population = vec![ /* what here? */ ];
        let actual = RouletteWheelSelection::new().select(&mut rng, &population);

        assert!(/* what here? */);
    }
}
此时我们有两个问题:
- 由于
Individual是一个 trait,那么我们如何为测试目的假装它存在呢? - 由于
.select()只返回一个个体,我们如何确保它是随机的呢?
从头开始:出于测试的目的创建虚假对象被称为 模拟 (Mocking)。虽然 rust 有一些模拟解决方案,但我必须承认我从未是模拟的拥趸。:
一个不需要任何外部 crate 的建议,是创建一个专用的测试结构体:
#[cfg(test)]
mod tests {
    /* ... */

    #[derive(Clone, Debug)]
    struct TestIndividual {
        fitness: f32,
    }

    impl TestIndividual {
        fn new(fitness: f32) -> Self {
            Self { fitness }
        }
    }

    impl Individual for TestIndividual {
        fn fitness(&self) -> f32 {
            self.fitness
        }
    }

    /* ... */
}
……然后我们可以这样使用:
#[cfg(test)]
mod tests {
    /* ... */

    #[test]
    fn roulette_wheel_selection() {
        /* ... */

        let population = vec![
            TestIndividual::new(2.0),
            TestIndividual::new(1.0),
            TestIndividual::new(4.0),
            TestIndividual::new(3.0),
        ];

        /* ... */
    }
}
那么断言又如何呢?我们可以像这样的测试:
#[cfg(test)]
mod tests {
    /* ... */

    #[test]
    fn roulette_wheel_selection() {
        /* ... */

        let actual = RouletteWheelSelection::new()
            .select(&mut rng, &population);

        assert!(actual, &population[2]);
    }
}
……并不能让人放心,因为它并不能证明确实考虑了适应度分数。完全无效的实现,例如:
impl SelectionMethod for RouletteWheelSelection {
    fn select<'a, I>(/* ... */) -> &'a I
    where
        I: Individual,
    {
        &population[2]
    }
}
……这将会轻松通过这样的测试!
幸运的是,我们并没有注定失败。因为我们想要评估概率,所以我们可以多次调用 .select() 并查看直方图:

#[cfg(test)]
mod tests {
    /* ... */
    use std::collections::BTreeMap;
    use std::iter::FromIterator;

    #[test]
    fn roulette_wheel_selection() {
        let mut rng = ChaCha8Rng::from_seed(Default::default());

        let population = vec![
            /* ... */
        ];

        let mut actual_histogram = BTreeMap::new();

        //          /--| nothing special about this thousand;
        //          v  | a number as low as fifty might do the trick, too
        for _ in 0..1000 {
            let fitness = RouletteWheelSelection
                .select(&mut rng, &population)
                .fitness() as i32;

            *actual_histogram
                .entry(fitness)
                .or_insert(0) += 1;
        }

        let expected_histogram = BTreeMap::from_iter([
            // (fitness, how many times this fitness has been chosen)
            (1, 0),
            (2, 0),
            (3, 0),
            (4, 0),
        ]);

        assert_eq!(actual_histogram, expected_histogram);
    }
}
Note
注意,在构建直方图时,我们将适应度分数从 f32 转换为 i32:
let fitness = RouletteWheelSelection
    .select(&mut rng, &population)
    .fitness() as i32;
我们必须这样做,因为 rust 中的浮点数没有实现 Ord trait,这使得无法将它们用作 BTreeMap 的键:
use std::collections::BTreeMap;

fn main() {
    let mut map = BTreeMap::new();
    map.insert(1.0, "one point zero");
}
error[E0277]: the trait bound `{float}: Ord` is not satisfied
  |
  |     map.insert(1.0, "one point zero");
  |         ^^^^^^ the trait `Ord` is not implemented for `{float}`
原因是,根据 IEEE 754 标准定义的浮点数不是全序集合 (Totally Ordered Set)。比较 NaN 是有问题的,因为:
NaN != NaN
在实践中这意味着,如果你能够将一个 NaN 插入到映射中,你不仅无法将其取回,而且这还可能破坏 BTreeMap 的内部数据结构,使得无法检索任何其它项目。
(顺便说一句,这对于自定义的 Ord 和 PartialOrd 实现也是如此。如果它们不满足非对称性和传递性,那么你将会遇到麻烦。)
如果你想进一步探索这个主题:
- https://doc.rust-lang.org/std/cmp/trait.PartialOrd.html
- https://www.reddit.com/r/rust/comments/cbrpll/why_doesnt_stdcmpord_is_implemented_for_floats
- https://www.reddit.com/r/rust/comments/29kia3/no_ord_for_f32
- https://stackoverflow.com/questions/26489701/why-does-rust-not-implement-total-ordering-via-the-ord-trait-for-f64-and-f32
cargo test(或者如果你在工作空间的目录中,使用 cargo test --workspace)返回:
thread '...' panicked at 'assertion failed: `(left == right)`
  left: `{1: 98, 2: 202, 3: 278, 4: 422}`,
 right: `{1: 0, 2: 0, 3: 0, 4: 0}`'
……证明 choose_weighted() 按照预期工作(具有较高适应度分数的个体被选择的频率更高),所以让我们调整测试代码:
#[cfg(test)]
mod tests {
    /* ... */

    #[test]
    fn roulette_wheel_selection() {
        /* ... */

        let expected_histogram = BTreeMap::from_iter(vec![
            // (fitness, how many times this fitness has been chosen)
            (1, 98),
            (2, 202),
            (3, 278),
            (4, 422),
        ]);

        /* ... */
    }
}
我们已经测试了不可测试的部分!现在 Selection 已经准备好了,让我们回顾一下我们停下的地方:
impl GeneticAlgorithm {
    pub fn evolve<I>(&self, population: &[I]) -> Vec<I>
    where
        I: Individual,
    {
        /* ... */

        (0..population.len())
            .map(|_| {
                // TODO selection
                // TODO crossover
                // TODO mutation
                todo!()
            })
            .collect()
    }
}
现在我们需要弄清楚的是如何将 SelectionMethod 传递进去。有两种方法:
- 使用参数:
impl GeneticAlgorithm {
    pub fn evolve<I, S>(
        &self,
        population: &[I],
        selection_method: &S,
    ) -> Vec<I>
    where
        I: Individual,
        S: SelectionMethod,
    {
        /* ... */
    }
}
- 使用构造函数:
pub struct GeneticAlgorithm<S> {
    selection_method: S,
}

impl<S> GeneticAlgorithm<S>
where
    S: SelectionMethod,
{
    pub fn new(selection_method: S) -> Self {
        Self { selection_method }
    }

    pub fn evolve<I, S>(&self, population: &[I]) -> Vec<I>
    where
        I: Individual,
    {
        /* ... */
    }
}
面对这种决定,我考虑用户需要多频繁地更改该对象:
每次调用 .evolve() 时,种群通常都是不同的,因此通过参数接受它是很方便的。另一方面,选择算法通常在整个模拟中保持不变,因此让用户通过构造函数提供它会更方便。
现在,我们几乎准备好调用选择方法了:
impl<S> GeneticAlgorithm<S>
where
    S: SelectionMethod,
{
    /* ... */

    pub fn evolve<I>(&self, population: &[I]) -> Vec<I>
    where
        I: Individual,
    {
        /* ... */

        (0..population.len())
            .map(|_| {
                let parent_a = self.selection_method.select(rng, population);
                let parent_b = self.selection_method.select(rng, population);

                // TODO crossover
                // TODO mutation
                todo!()
            })
            .collect()
    }
}
……我们唯一缺少的是 PRNG:
impl<S> GeneticAlgorithm<S>
where
    S: SelectionMethod,
{
    /* ... */

    pub fn evolve<I>(&self, rng: &mut dyn RngCore, population: &[I]) -> Vec<I>
    where
        I: Individual,
    {
        /* ... */
    }
}
Note
你可能会想知道为什么我们通过参数传递 rng 而不是通过构造函数传递它。毕竟,随机数生成器不会在每次演化时更改!
这个决定更加微妙,让我们探索一下我们可以编写这段代码的其它方式:
- 通过构造函数接受拥有的 PRNG:
pub struct GeneticAlgorithm<R> {
    rng: R,
}

impl<R> GeneticAlgorithm<R>
where
    R: RngCore,
{
    pub fn new(rng: R) -> Self {
        Self { rng }
    }
}
- 通过构造函数接受借用的 PRNG:
pub struct GeneticAlgorithm<'r> {
    rng: &'r mut dyn RngCore,
}

impl<'r> GeneticAlgorithm<'r> {
    pub fn new(rng: &'r mut dyn RngCore) -> Self {
        Self { rng }
    }
}
第一种方法是我会建议在 C# 或 Java 中使用的方法。但在 Rust 中情况不同,因为如果我们将 rng 移动到构造函数中,我们将无法在应用程序的其它位置使用它:
fn main() {
    let rng = /* ... */;
    let ga = GeneticAlgorithm::new(rng);

    // oh no, we can't use this `rng` anymore!
    if rng.gen_bool() {
        /* ... */
    } else {
        /* ... */
    }
}
你可以争论同样的情况已经发生在 SelectionMethod 上:
fn main() {
    let sp = RouletteWheelSelection::new();
    let ga = GeneticAlgorithm::new(sp);

    // oh no, we can't use this `sp` anymore!
    if sp.something() {
        /* ... */
    }
}
……但在我看来,Rng 是一个更具有通用性的 trait。在 GeneticAlgorithm 之外使用它是有意义的,而对于 SelectionMethod 则不能这样说。
总而言之,你可以说这是一个牵强的解释。选择一个「更通用」的 trait 只不过是一种直觉。
至于 &mut dyn RngCore 变体,我认为它是最糟糕的。因为它需要对 rng 进行唯一借用 (&mut),所以它不仅「锁定」了 PRNG,还使其在遗传算法的生命周期内不能被其它地方使用:
fn main() {
    let rng = /* ... */;
    let ga = GeneticAlgorithm::new(&mut rng);

    // oh no, we still can't use this `rng`!
    let population = if rng.gen_bool() {
        /* ... */
    } else {
        /* ... */
    };

    ga.evolve(population);
}
……它也会阻止其它有效的用例,例如:
struct Simulation {
    rng: ChaCha8Rng,
    ga: GeneticAlgoritm<'whats_this_lifetime??>,
}

impl Simulation {
    pub fn new_chacha() -> Self {
        let rng = ChaCha8Rng::from_seed(Default::default());
        let ga = GeneticAlgorithm::new(&mut rng);

        Self { rng, ga } // whoopsie
    }
}
顺便说一下,这被称为 自引用结构 (Self-referential Struct):
实现 Crossover
现在我们已经选择了两个父代个体,是时候进入交叉阶段了。
交叉(也称为 重组 (Recombination))需要两个个体并将它们混合,在结果中创建出一个新的解决方案。

与简单地创建全新的随机个体相比,交叉在尝试保留知识方面做的十分巧妙。大体思想是混合两个好的解决方案通常会产生一个既新又至少与我们已有的两个解决方案一样好的解决方案,这样就可以在不失去迄今为止发现的最佳解决方案的条件下探索搜索空间。
就像在现实世界中一样,交叉实际上并不发生在个体上,而是发生在它们的 染色体 (Chromosomes) 上。这是「解决方案的编码」的一个花哨的词汇:

染色体通常由基因构成,将染色体建模为 bitset 会很方便:

……有时候使用字符串会更方便:

……不过我们将使用我们已经拥有的东西:一堆表示神经网络权重的 f32 值:

#[derive(Clone, Debug)]
pub struct Chromosome {
    genes: Vec<f32>,
}
我们将提供一些允许查看染色体内部的函数,而不是直接 public 基因。这称为封装:
impl Chromosome {
    pub fn len(&self) -> usize {
        self.genes.len()
    }

    pub fn iter(&self) -> impl Iterator<Item = &f32> {
        self.genes.iter()
    }

    pub fn iter_mut(&mut self) -> impl Iterator<Item = &mut f32> {
        self.genes.iter_mut()
    }
}
抓住机会,让我们来了解一些标准库中酷炫的 trait:
- Index允许你在类型上使用 索引运算符 (Indexing Operator) ——
[]:
use std::ops::Index;

/* ... */

// ---
// | this is the type of expression you expect inside the square brackets
// |
// | e.g. if you implemented `Index<&str>`, you could write:
// |   chromosome["yass"]
// ------- v---v
impl Index<usize> for Chromosome {
    type Output = f32;

    fn index(&self, index: usize) -> &Self::Output {
        &self.genes[index]
    }
}
- FromIterator允许你将结果
.collect()到类型中:
// ---
// | this is the type of the item an iterator should provide in order to be compatible
// | with our chromosome
// |
// | (sometimes it's called the type an iterator *yields*)
// |
// | intuitively, since our chromosome is built of of floating-point numbers, we
// | expect floating-point numbers in here as well
// -------------- v-v
impl FromIterator<f32> for Chromosome {
    fn from_iter<T: IntoIterator<Item = f32>>(iter: T) -> Self {
        Self {
            genes: iter.into_iter().collect(),
        }
    }
}
- 最后,还有一个 IntoIterator,它的工作方式相反,是将一个类型转换为一个迭代器:
impl IntoIterator for Chromosome {
    type Item = f32;
    type IntoIter = std::vec::IntoIter<f32>;

    fn into_iter(self) -> Self::IntoIter {
        self.genes.into_iter()
    }
}
Note
std::vec::IntoIter<f32> 迭代器只是另一种类型,它实现了 Iterator trait。
struct Fibonacci {
    prev: u32,
    curr: u32,
}

impl Default for Fibonacci {
    fn default() -> Self {
        Self { prev: 0, curr: 1 }
    }
}

impl Iterator for Fibonacci {
    type Item = u32;

    fn next(&mut self) -> Option<u32> {
        let next = self.prev + self.curr;

        self.prev = self.curr;
        self.curr = next;

        Some(self.prev)
    }
}

fn main() {
    for number in Fibonacci::default().take(10) {
        println!("{}", number);
    }
}
因此,如果你想将类型转换为迭代器,你需要知道目标的可迭代类型是什么。在我们的例子中,由于 Chromosome 只是 Vec 的 包装器 (Wrapper),目标类型是 std::vec::IntoIter:
struct Chromosome {
    genes: Vec<f32>,
}

impl IntoIterator for Chromosome {
    type Item = f32;
    type IntoIter = (); // note that we're deliberately using the wrong type here

    fn into_iter(self) -> Self::IntoIter {
        self.genes.into_iter()
    }
}
error[E0308]: mismatched types
   |
   | /* ... */
   |
   = note: expected unit type `()`
                 found struct `std::vec::IntoIter<f32>`
然而,命名这种类型并不容易,因为诸如 .filter() 或 .map() 这样的 组合器 (Combinators) 都会影响它:
struct Somethinger {
    values: Vec<f32>,
}

impl IntoIterator for Somethinger {
    type Item = f32;
    type IntoIter = ();

    fn into_iter(self) -> Self::IntoIter {
        self.values
            .into_iter()
            .filter(|value| *value > 0.0)
            .map(|value| value * 10.0)
    }
}
error[E0308]: mismatched types
   |
   | /* ... */
   |
   = note: expected unit type `()`
                 found struct `Map<Filter<std::vec::IntoIter<f32>, {closure}>, {closure}>`
Nightly Rust 为这个问题提供了一个舒适的解决方案——impl_trait_in_assoc_type:
#![feature(impl_trait_in_assoc_type)]

struct Somethinger {
    values: Vec<f32>,
}

impl IntoIterator for Somethinger {
    type Item = f32;
    type IntoIter = impl Iterator<Item = f32>;

    fn into_iter(self) -> Self::IntoIter {
        self.values
            .into_iter()
            .filter(|value| *value > 0.0)
            .map(|value| value * 10.0)
    }
}
实质上就是让编译器自行找出类型。但由于我们使用的是稳定的工具链,我们无法使用这个特性。幸运的是,我们也不需要使用它。
正如我之前所说的:
[...] 交叉实际上并不发生在个体上,而是发生在它们的染色体上 [...]
……这就引出了:
impl<S> GeneticAlgorithm<S>
where
    S: SelectionMethod,
{
    /* ... */

    pub fn evolve<I>(/* ... */) -> Vec<I>
    where
        I: Individual,
    {
        (0..population.len())
            .map(|_| {
                let parent_a = self.selection_method.select(rng, population).chromosome();
                let parent_b = self.selection_method.select(rng, population).chromosome();

                /* ... */
            })
            .collect()
    }
}

/* ... */

pub trait Individual {
    fn fitness(&self) -> f32;
    fn chromosome(&self) -> &Chromosome;
}

/* ... */

#[cfg(test)]
mod tests {
    /* ... */

    impl Individual for TestIndividual {
        fn fitness(&self) -> f32 {
            self.fitness
        }

        fn chromosome(&self) -> &Chromosome {
            panic!("not supported for TestIndividual")
        }
    }

    /* ... */
}
至于交叉本身,我们可以通过很多算法来实现。通常最好尝试其中的一些算法,并看看哪种对于给定的问题效果最好,但为了简单起见,我们将选择 均匀交叉算法 (Uniform Crossover),它可以用一幅简单的图示来描述:
和之前一样,让我们从一个 trait 开始:
pub trait CrossoverMethod {
    fn crossover(
        &self,
        rng: &mut dyn RngCore,
        parent_a: &Chromosome,
        parent_b: &Chromosome,
    ) -> Chromosome;
}
……还有一个基本的实现:
#[derive(Clone, Debug)]
pub struct UniformCrossover;

impl CrossoverMethod for UniformCrossover {
    fn crossover(
        &self,
        rng: &mut dyn RngCore,
        parent_a: &Chromosome,
        parent_b: &Chromosome,
    ) -> Chromosome {
        let mut child = Vec::new();
        let gene_count = parent_a.len();

        for gene_idx in 0..gene_count {
            let gene = if rng.gen_bool(0.5) {
                parent_a[gene_idx]
            } else {
                parent_b[gene_idx]
            };

            child.push(gene);
        }

        child.into_iter().collect()
    }
}
你可能注意到了,这段代码还有一些问题。为此,我们先添加一个断言:
impl CrossoverMethod for UniformCrossover {
    fn crossover(/* ... */) -> Chromosome {
        assert_eq!(parent_a.len(), parent_b.len());

        /* ... */
    }
}
然后,我们可以使用一个组合器。我们之前已经了解到了这个,它是 .zip():
impl CrossoverMethod for UniformCrossover {
    fn crossover(/* ... */) -> Chromosome {
        assert_eq!(parent_a.len(), parent_b.len());

        parent_a
            .iter()
            .zip(parent_b.iter())
            .map(|(&a, &b)| if rng.gen_bool(0.5) { a } else { b })
            .collect()
    }
}
多么整洁的代码呀!
注:通过之前实现的 .iter() 和 FromIterator,我们能够将此处的代码减少到最少,从而传达使用均匀交叉的本质。
你可能仍然会警觉到某些东西丢失了……嗯……啊,测试!
#[cfg(test)]
mod tests {
    /* ... */

    #[test]
    fn uniform_crossover() {
        let mut rng = ChaCha8Rng::from_seed(Default::default());
        let parent_a = todo!();
        let parent_b = todo!();
        let child = UniformCrossover.crossover(&mut rng, &parent_a, &parent_b);

        assert!(/* ... */);
    }
}
简单来说,我们想要验证的是 child 是 parent_a + parent_b。
我的建议是生成两个不同的染色体(它们不必是随机的,只需由不同的基因构建):
#[cfg(test)]
mod tests {
    /* ... */

    #[test]
    fn uniform_crossover() {
        /* ... */

        let parent_a: Chromosome = (1..=100).map(|n| n as f32).collect();
        let parent_b: Chromosome = (1..=100).map(|n| -n as f32).collect();

        // First parent will be:
        //   [1, 2, /* ... */, 100]
        //
        // Second parent will look similar, but with reversed signs:
        //   [-1, -2, /* ... */, -100]
        //
        // Just like in the histogram, the concrete number of genes doesn't
        // matter - 100 will nicely round up to 100%, that's all

        /* ... */
    }
}
……然后比较每个 child 的差异有多大:
#[cfg(test)]
mod tests {
    /* ... */

    #[test]
    fn uniform_crossover() {
        /* ... */

        let child = UniformCrossover.crossover(&mut rng, &parent_a, &parent_b);

        // Number of genes different between `child` and `parent_a`
        let diff_a = child.iter().zip(parent_a).filter(|(c, p)| *c != p).count();

        // Number of genes different between `child` and `parent_b`
        let diff_b = child.iter().zip(parent_b).filter(|(c, p)| *c != p).count();

        assert_eq!(diff_a, 0);
        assert_eq!(diff_b, 0);
    }
}
运行测试,得到:
thread '...' panicked at 'assertion failed: `(left == right)`
  left: `49`,
 right: `0`'
……所以,让我们调整测试:
assert_eq!(diff_a, 49);
另一个测试会在第二处断言失败:
thread '...' panicked at 'assertion failed: `(left == right)`
  left: `51`,
 right: `0`'
……同理:
assert_eq!(diff_b, 51);
回想一下,我们得到的是:
#[cfg(test)]
mod tests {
    /* ... */

    #[test]
    fn uniform_crossover() {
        /* ... */

        assert_eq!(diff_a, 49);
        assert_eq!(diff_b, 51);
    }
}
……这意味着我们的 child 从 parent_a 处遗传了 的基因,从 parent_b 处遗传了 的基因。这最终证明了我们的均匀交叉算法确实以相同的概率从父母双方中选择基因。
(我们没有得到精确的 - 匹配,但这只是由于概率的性质。)
现在我们可以将 CrossoverMethod 传递到 SelectionMethod:
pub struct GeneticAlgorithm<S> {
    selection_method: S,
    crossover_method: Box<dyn CrossoverMethod>,
}

impl<S> GeneticAlgorithm<S>
where
    S: SelectionMethod,
{
    pub fn new(
        selection_method: S,
        crossover_method: impl CrossoverMethod + 'static,
    ) -> Self {
        Self {
            selection_method,
            crossover_method: Box::new(crossover_method),
        }
    }

    /* ... */
}
Note
与 SelectionMethod::select() 相反,CrossoverMethod::crossover() 不包含任何泛型参数,这就是为什么我们可以将其包装在 Box 中的原因。另一种方法可能是:
pub struct GeneticAlgorithm<S, C> {
    selection_method: S,
    crossover_method: C,
}

impl<S, C> GeneticAlgorithm<S, C>
where
    S: SelectionMethod,
    C: CrossoverMethod,
{
    pub fn new(
        selection_method: S,
        crossover_method: C,
    ) -> Self {
        Self {
            selection_method,
            crossover_method,
        }
    }

    /* ... */
}
……这里的权衡与我们之前讨论 T: Trait vs dyn Trait 时一样(其中 Box<dyn Trait> 对应为动态分发)。
因为 Rust 让在泛型参数上添加基因参数变得非常容易,一些人认为使用 Box(它有轻微的性能损失)会使 Rust 代码不符合惯用法。
我的观点是,Box 是一种方便的机制,其潜在的运行时权衡是通过更易于维护的代码来支付的。我建议使用 Box,除非基准测试证明它是一个问题,或者除非它使代码难以阅读。
……然后我们可以调用它:
impl<S> GeneticAlgorithm<S>
where
    S: SelectionMethod,
{
    /* ... */

    pub fn evolve<I>(&self, rng: &mut dyn RngCore, population: &[I]) -> Vec<I>
    where
        I: Individual,
    {
        /* ... */

        (0..population.len())
            .map(|_| {
                /* ... */

                let mut child = self.crossover_method.crossover(rng, parent_a, parent_b);

                /* ... */
            })
            .collect()
    }
}
实现 Mutation
TODO